The Internet was a buzz with cinemagraphs, an artistic and more sophisticated form of animated GIFs that fit somewhere between a still image and a moving video.
Cinemagraphs are like animated GIFs as far as the image format is concerned but a big difference is that, in a Cinemagraph, only a portion of a photograph is moving in an infinite loop while everything else is frozen. For instance, in the image embedded above, only the girl's hair is moving slightly with the wind and the frames repeat after every few seconds.
You can find an extensive and captivating collection of cinemagraphs on fashion photographer Jamie Beck's Tumblr created in collaboration with designer Kevin Burg.
How to Create Cinemagraphs?
Cinemagraphs are small animated GIF files created from a movie, that capture a tiny moving section of that movie in a forever looping sequence.
Note: You'll need the Extended version of Photoshop to do this, as it includes the Animation components. You'll also need a very basic working knowledge of Photoshop, as the key concepts such as layers, or how to trash them or make them invisible. Windows users, replace CMD with CTRL, and OPTION with ALT keys in the tutorial.
Movies, Timelines & QuickMasks

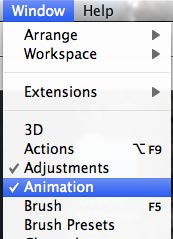
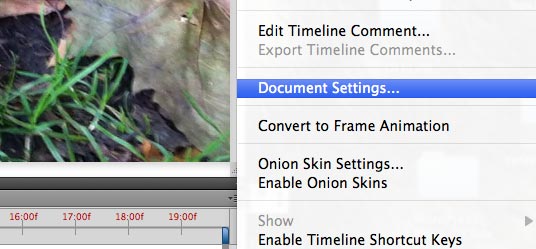
Find the small icon for the animation drop down menu in the top right of the timeline, as we're going to be using it a lot. Click it, and find the Document Settings. Change the frame rate to about 15 if it's higher. Generally, videos will start out at about 30 frames per seconds, which is too high for simple animations.

Next, get familiar with the timeline a little more. Along the top of the timeline is a blue pointer which indicates the current frame in the sequence. Drag it to scrub back and forth through your movie. There are also play controls in the bottom right.
Drag the pointer to where you want your movie to start. Now, drag the blue rectangle that marks the start of the movie to where your pointer has moved to. Hold down the shift key to have it snap onto your pointer location. If you hit play again, you should notice that the movie now begins where you set it to.
Drag the marker again to where you want the movie to end, and do the same with the small blue end marker from the right hand side. Now preview again, and you should see the basic loop of your movie taking place. If everything is good, select Trim Document Duration to Work Area from the timeline menu again in the top right.
Next, you need to find your master frame - this is the one frame of video that will be the backdrop-the bit of your animation that doesn't move. Scrub the marker until you see the desired frame, then hit CMD'A to select all and CMD'C to copy, then CMD-V to paste. This should create a new layer with your selected keyframe.
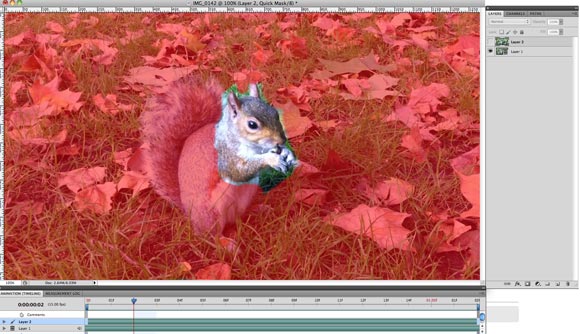
Next, hit the Q key to open QuickMask mode. Select the paintbrush tool and a suitable size brush, and begin to paint the areas of your movie that you wish to remain static. In QuickMask mode, you should see them highlighted red when you paint (if not, you're not in quick mask mode, so undo and try again). Leave the areas which have the moving element of the movie that you want to retain.

Having highlighted all the bits of the scene that you want to stay still, hit Q again to exit the QuickMask mode, then hold ALT and click the Add Layer Mask button on the layer palette. That's the button on the bottom that's a rectangle with a circle in it.


